VPN Test Environment with Docker Compose
This project sets up a VPN test environment using Docker Compose, allowing two remote clients to securely access an internal Ubuntu server and a simple web server on a simulated enterprise LAN.
Project Structure
docker-compose.yml: Defines the services (OpenVPN server, web server, Ubuntu server) and their configurations.openvpn-data/conf/: Stores OpenVPN server configuration files, certificates, and keys.webserver/html/: Contains theindex.htmlfile served by the internal web server.ubuntu-server/: (Optional) You can place scripts or configuration files for the Ubuntu server here.client1.ovpn: OpenVPN configuration file for client 1.client2.ovpn: OpenVPN configuration file for client 2.
Prerequisites
- Docker Engine and Docker Compose installed on your server machine.
- Basic understanding of networking concepts (IP addresses, subnets, ports).
- At least one another machine for testing.
Setup Steps
1. Project Directory
-
Create a directory for this project:
SH -
Create subdirectories:
SH
2. Docker Compose File
- Create a file named
docker-compose.ymlwith the following content:
3. Web Server Content
- Create a simple
index.htmlfile in./webserver/html:
4. Generate OpenVPN Configuration
-
Initialize OpenVPN and Generate Server Config:
SH- Replace
YOUR_PUBLIC_IPwith the actual public IP address of your server. (usecurl ifconfig.meto get the public IP or check on google) - Adjust the port (40000 here) if you chose a different one.
- -n option allows you to set DNS, here we use google's one, but you can use the one you prefer
- Replace
-
Initialize the PKI (Public Key Infrastructure):
SH- You'll be prompted to set a passphrase for the CA (Certificate Authority). Choose a strong one and remember it.
-
Generate Client Certificates:
SH -
Retrieve Client Configuration Files:
SH- This will create
client1.ovpnandclient2.ovpnin your project directory.
- This will create
The .ovpn file contains all the necessary parameters to connect to the server such as:
- Server's address (IP or hostname) and port.
- Protocol (UDP or TCP).
- Certificates and keys.
- Cipher and authentication settings.
- Other options like compression, persistence, etc.
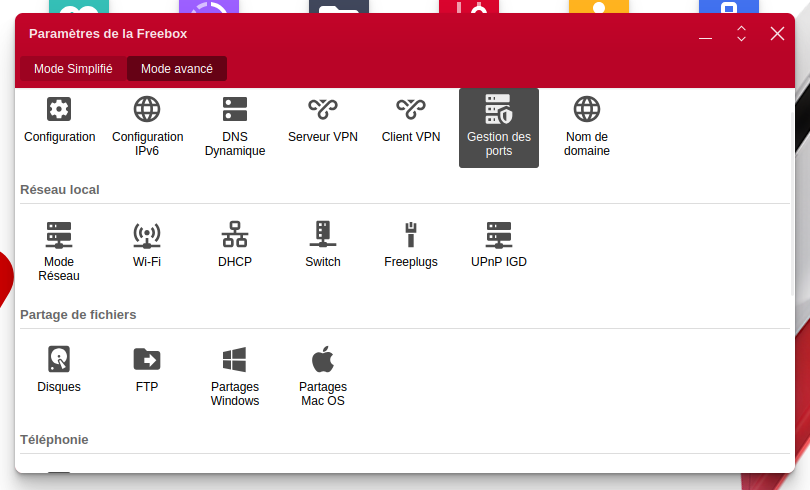
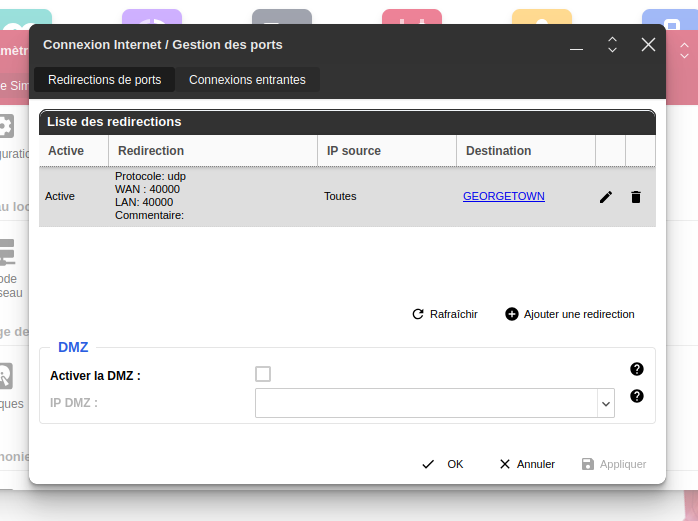
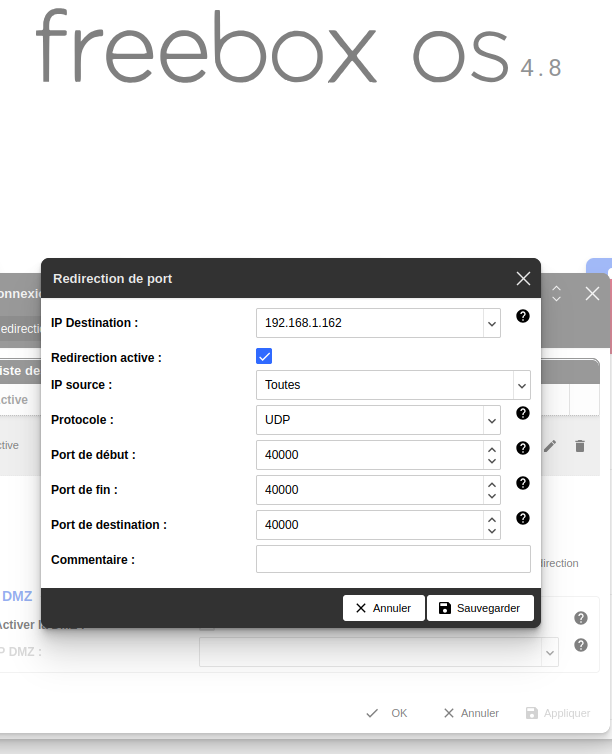
5. Configure Router (Port Forwarding)
- If your server is behind a router (like Freebox), you need to configure port forwarding:
- Log in to your router's administration interface (e.g.,
192.168.1.254for Freebox). - Find the "Port Forwarding" or "Redirection de Ports" settings.
- Create a rule to forward UDP port 40000 (or the port you chose) from the internet to the internal IP address of your server machine on port 40000.
- Log in to your router's administration interface (e.g.,


6. Configure Firewall (Server)
-
If you have a firewall enabled on your server (e.g.,
ufw), allow incoming traffic on the OpenVPN port:SH
7. Start the Environment
-
Start the Docker Compose services:
SH
8. Client Setup (Ubuntu Example for Client 1, my other Ubuntu laptop)
-
Install OpenVPN:
SH -
Transfer
client1.ovpn:- Transfer the
client1.ovpnfile to your Ubuntu client machine (usingscp, a USB drive, or other methods). I've used gmail mhahaha!!!
- Transfer the
-
Connect (Command Line):
SH- Keep the terminal open while connected.
-
Connect (Network Manager - Optional):
- Import
client1.ovpninto Network Manager. - Connect through the Network Manager interface.
- Import
9. Testing the Connection
-
Verify IP and Interface:
- On the client, use
ip addr showto check for atun0ortap0interface with an IP in the 172.20.0.0/16 subnet.
- On the client, use
-
Ping Tests:
- Ping the web server:
ping 172.20.0.3 - Ping the Ubuntu server:
ping 172.20.0.4
- Ping the web server:
-
Access Web Server:
- Open a browser on the client and go to
http://172.20.0.3.
- Open a browser on the client and go to
-
SSH to Ubuntu Server (Optional):
ssh username@172.20.0.4(replace with the correct username and IP).
Look at openvpn in detail.pdf file to learn more about the core key exchange and tls.
Troubleshooting
-
TLS Key Negotiation Failed:
- Verify your server's public IP address in
client1.ovpn. - Check firewall rules on the server and router.
- Ensure port forwarding is configured correctly.
- Double-check for typos in commands.
- Verify your server's public IP address in
-
netcatTest:- On the server, inside the
openvpncontainer:nc -u -l -p 5555 - On the client:
nc -u YOUR_SERVER_PUBLIC_IP 1194 - Type messages to see if they are received on the other end. This tests basic UDP connectivity.
- On the server, inside the
-
Cipher Issue (Warning):
- Add
data-ciphers-fallback BF-CBCto bothserver.confandclient1.ovpnif needed (less likely to be the cause of major problems).
- Add
-
Other Issues:
- Examine OpenVPN server logs:
docker-compose logs openvpn - Check client-side logs.
- Consult OpenVPN documentation and forums.
- Examine OpenVPN server logs:
Security Considerations (for Production)
- Stronger Authentication: Use certificate-based authentication with strong ciphers.
- Firewall: Implement a robust firewall on your server.
- Intrusion Detection: Set up an IDS to monitor for suspicious activity.
- Regular Updates: Keep all software up to date.
- Principle of Least Privilege: Grant users only the necessary access.
Disclaimer
This guide is for educational and testing purposes. It provides a basic setup and may not cover all security aspects required for a production environment. Adapt and enhance the configuration based on your specific security needs and best practices.